Craft CMS 3.5 update introduced complete rework of field layout designer. Edit pages of entries, categories, and other elements can now contain UI elements along with regular fields. These are headers, warning/notification messages, horizontal lines and templates.
Template UI element allows us to include Twig file into element edit page. This template will have access to this specific element, as well as to all regular Twig functionality. This means that without writing any kind of modules or plugins we can easily expand functionality of the control panel.
How does it work? #
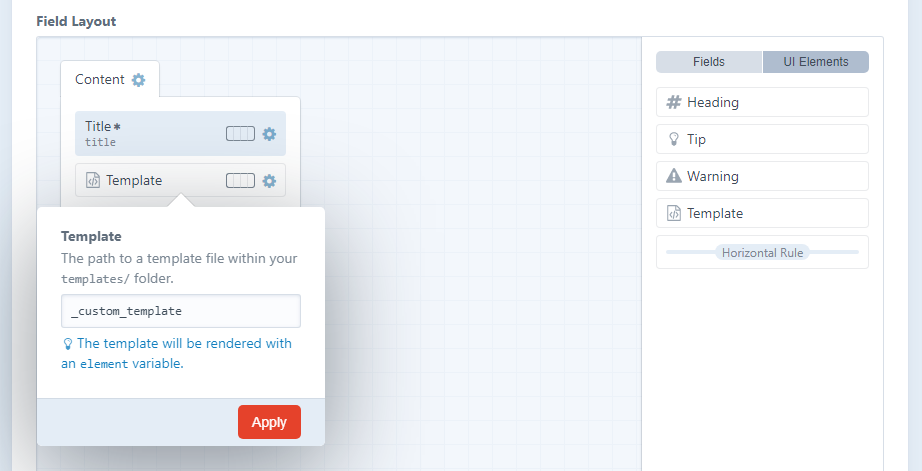
Here's how adding template UI element looks like - just drop it into field layout from the list on the right side and click cogwheel icon to enter path to Twig file in templates directory.

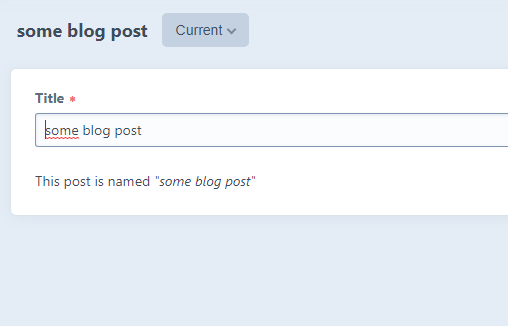
Every template used as UI element has element variable avaible, representing the current element. Assuming that our template is added to entry field layout, let's do something very simple - output entry title:
This post is named <i>"{{element.title}}"</i>
This is what you will see on the entry control panel page.

Now, how about creating something useful with this functionality?
Displaying reverse element relations #
When we relate one element to another, for example, entry to a category, only one side of this relation is displayed in control panel. In our category example, entry would have category field in which we would see selected categories.
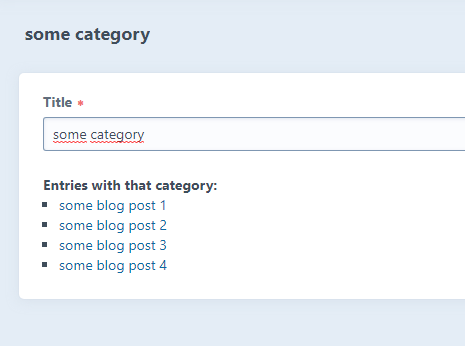
Using template UI element we can display on category page all entries that belong to it. Here's an example:
<strong>Entries with that category:</strong>
<ul style="list-style: square; margin-left: 1rem;">
{% for singleEntry in craft.entries.relatedTo(element).orderBy('dateCreated').all() %}
	<li>
		<a href="{{singleEntry.getCpEditUrl()}}">{{singleEntry.title}}</a>
	</li>
{% endfor %}
</ul>
Here's rendered result:

It's pretty basic stuff - just element query with relatedTo and orderBy methods. Note that link address uses getCpEditUrl() method, not a standard url - we want to visit control panel page of specific entry, not its frontend address.
Note the usage of <strong> element or inline styling. There is no need to write any external CSS sheets - we just need to sprinkle bit CSS on top of our markup to give it some visual hierarchy.
Displaying comments of specific entry #
Here's another example use case - displaying comments made with Verbb Comments plugin. This plugin has control panel page that displays all comments - but when we are on entry page in control panel, there is no such thing as "comments for this entry" list.
With template UI element we can make one.
{% for singleComment in craft.comments.fetch().owner(element).all() %}
	<strong>
		<a href="{{singleComment.author.getCpEditUrl()}}">{{singleComment.author}}</a>
	</strong>
	- {{singleComment.dateCreated|date}}
	<br>
	{{singleComment.comment|nl2br}}
	<br>
	<a href="{{singleComment.getCpEditUrl()}}">[edit]</a>
	<br>
	<hr>
{% endfor %}
In this example, we also used getCpEditUrl() - to retrieve control panel URL of specific comments as well as users that submitted these comments. Note that this piece of code assumes that all comments are created by users with accounts and does not take into account possible hierarchical structure of comments - doesn't show if comments is reply to another comment.


